How to Draw a Fish Easily: Step-by-Step Drawing Guide for Beginners
-
 Fatima Saif
- . January 7, 2026
- . Update: January 7, 2026 2:16 am
Knowing on how to draw a fish is an enjoyable and carefree exercise among children, novices and even adults, who feel like developing their drawing abilities. Fish drawings are minimalistic and yet artistic and therefore ideal in practicing simple shapes and lines. Sketching in your spare time, whether it is a school project, hobby in art, or simply a fun exercise, it can be much easier to draw when you know the proper procedure. In this guide, you will be taught on how to step by step draw a fish using simple steps. It requires practice and patience, but with a few minutes you can have a nice and attractive fish drawing even when you are at the very beginning of your practice.
Materials Needed
Prepare some basic materials before you begin with how to draw a fish. All you require is a sheet of paper, pencil and an eraser. In case you want to add color later you can have crayons, color pencils or sketch pens. The beginners are advised to begin with a pencil, and hence can correct the mistakes easily.
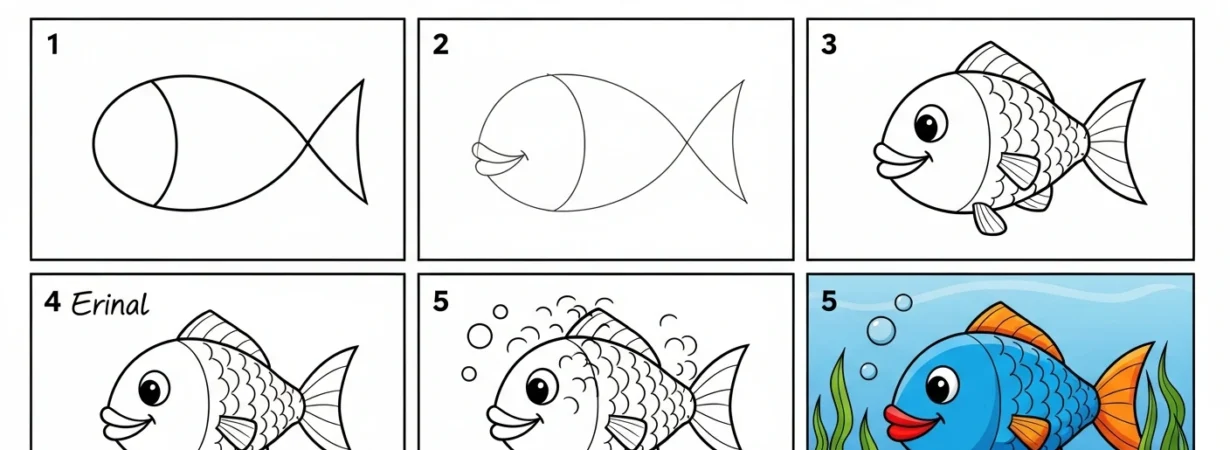
Step 1: Draw the Fish Body
The initial process in the procedure of drawing a fish is the body. The shape could be an almond-shaped or simple oval in the middle of the paper. This will serve as the principal part of the fish. You should make them light so that you can change them later.
Step 2: Add the Tail
Then again, taking two curved lines out of the back of the oval make the tail. These lines can be connected at the end forming a V or fan shape. This is a very essential step in teaching how to draw a fish because the tail gives life and personality to what you draw.
Step 3: Draw Fins
In order to proceed with the instructions on how to draw a fish, put on some fins. Exquisitely mark on top of the body a little curved fin and a similar one at the bottom. A side fin can also be added in the form of a leaf. The fins are used to make the fish look more natural and balanced.
Step 4: Add the Eye and Mouth
Then you will have to sketch a little circle in front of the body that represents the eye. Pluck a little bit of detail in it. Dividing a little curved line that is the mouth. It is a step that renders the process of drawing a fish more interesting and expressive.
Step 5: Add Details and Scales
Make the drawing better by putting curved lines within the body to depict scales. It is also possible to add lines of texture on the tail and fins. This is because these little things enhance your end product in learning how to draw a fish.
Step 6: Outline and Color
When you are happy, darken the last outline and remove unnecessary lines of pencil. It is now possible to color your fish in the brightest colors: blue, orange, yellow. Drawing a fish is not complete without coloring it to make it attractive.