How to Draw Naruto Step by Step: An Easy Guide for Beginners
-
 Fatima Saif
- . December 24, 2025
- . Update: December 24, 2025 1:16 am
The art of drawing Naruto is a fantasy of anime lovers and amateur artists. Naruto Uzumaki is among the most famous anime characters, whose hair is spiky, eyes expressive, and headband is his distinctive feature. This guide is in case you have ever watched Naruto and thought how artists make him come alive on paper. This article will give you an easy step by step method which will convert the drawing process into small achievable steps. Be it by drawing as a hobby or you are training on how to draw Naruto perfectly, knowing how to draw Naruto properly will make you confident and precise. Anyone can learn this anime drawing with time and practice.
Materials Needed to Draw Naruto
Preparation Prepare simple drawing materials. All you will require is a pencil, an eraser, sharpener and plain paper. Extra supplies such as fine liners, colored pencils may be used to make your end product better. Being equipped would simplify the process of learning to draw Naruto and it would be more entertaining to the beginners.
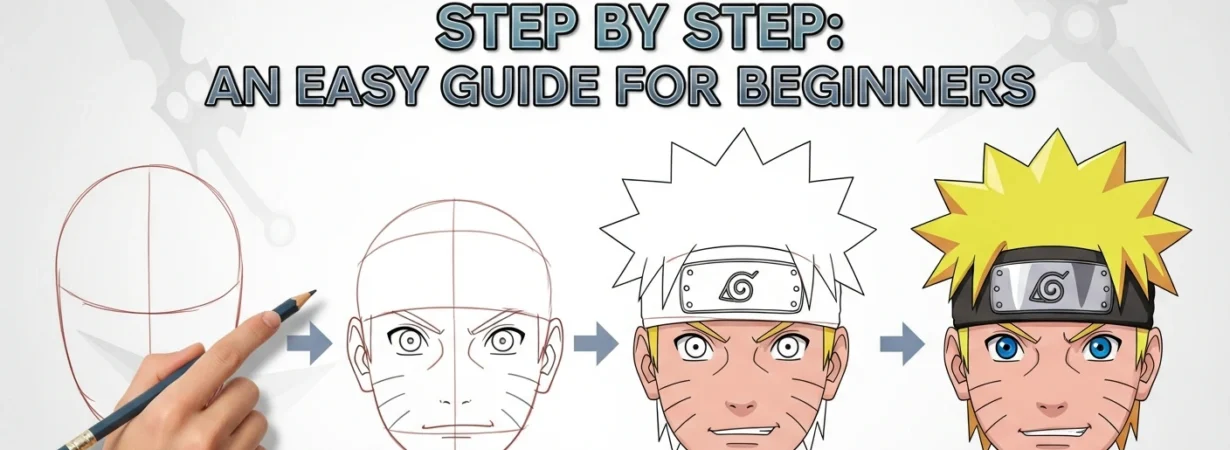
Step 1: Draw the Basic Face Shape
To start with, draw a light circle of the head. Add a horizontal and vertical line that may assist in positioning facial features in a proper manner. This background is a pre-requisite in learning how to draw Naruto since it provides the right proportions. You want to make your lines light in order to be erased easily.
Step 2: Add Facial Features
Follow the eyes of Naruto using the horizontal line. His eyes are big and communicative making him look determined. Add on some little nose and a plain mouth. One more thing not to forget is the three whisker marks on Naruto cheeks, these facts are essential when learning to draw Naruto correctly.
Step 3: Sketch the Hair and Headband
Naruto has spiky hair which characterizes him. Sharpen and sketchy spikes around the head, leaving the spikes a little bit sloppy to create a natural appearance. Attach the ninja headband over his forehead with the plate of metal and leaf. This process will take the sketch of how to draw Naruto near its original figure.
Step 4: Draw the Neck and Clothing
Draw a short neck and put the collar of Naruto jacket. Maintain innocent lines of clothing. These details will help you better understand how to illustrate Naruto in a better structure and style.
Step 5: Final Touches and Shading
Strangle the redundant rules and blacken the last lines. Light shade the hair, eyes and clothing. You can color your drawing in case you want. The trick to this is to practice to draw Naruto smoothly and confidently.