How to Lock Cells in Excel: A Complete Step-by-Step Guide
-
 Omar Haddad
- . December 10, 2025
- . Update: December 11, 2025 10:36 am
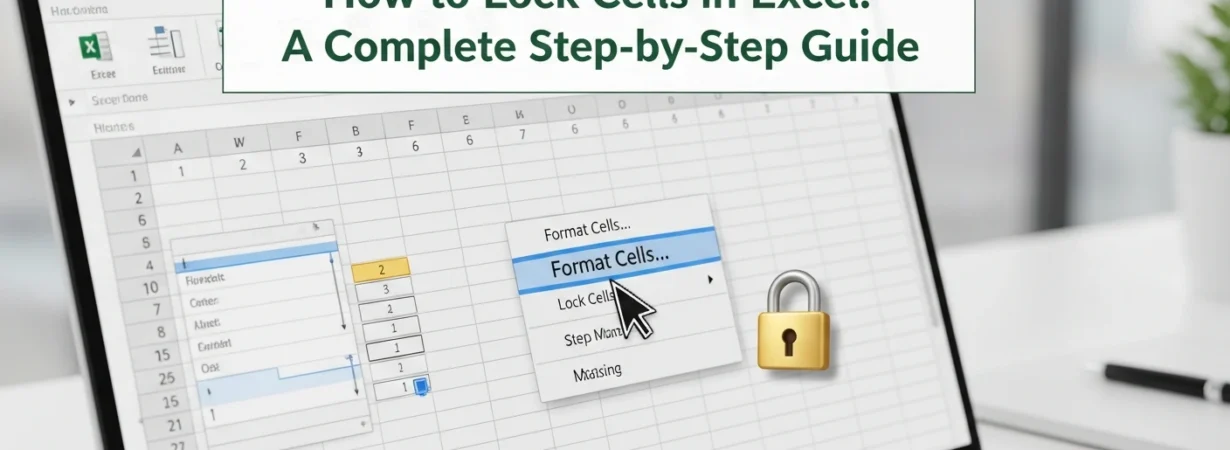
When necessary – due to the protection of valuable formulas, the possibility of accidental deletions, or the need to ensure that certain data is not altered by unauthorized persons – it is necessary to understand how to lock cells in Excel. Whether it is reports, financial sheets, dashboards or collaborative worksheets, know how to lock cells in excel so that your data does not get altered. It might sound confusing when using the Excel because the process only requires three simple steps, which are unlocking all the cells, locking the selected cells and protecting the worksheet. You will be taught the simple steps of locking cells in excel using simple and practical steps in this guide.
Step 1: Unlock All Cells (Default Behavior)
Excel sets all cells to be Locked by default, however, till the sheet has been sheet protected, it will not lock. The initial step to take is to unlock everything to control which cells you would wish to protect.
- To choose the whole work sheet, either use Ctrl + A or the triangle at the upper left corner.
- Click on the part and select Format Cells, or press Ctrl + 1.
- Open the Protection tab.
- Uncheck Locked, then click OK.
This makes sure that you can only lock those cells that you wish to lock at a later stage.
Step 2: Lock the Specific Cells You Want to Protect
At this point you have the option of selecting the specific cells you want to protect, since all the cells are unlocked.
- Incident light on the cell or range to lock.
- Open Format Cells again.
- Go to the Protection tab.
- Turn on the Locked box and press the OK button.
This is the critical section of how to lock cells in excel and have complete control of what would remain safeguarded.
Step 3: Protect the Worksheet
You need to cover the sheet in order to unlock your locked cells.
- Click the Review tab in the excel Ribbon.
- Select Protect Sheet.
- You can have additional security, which involves entering a password (optional).
- Select authorised features like picking of cells or the formatting of the same should it be necessary.
- Click OK.
The cells that you locked in Step 2 are only made uneditable after activation. Other cells are completely available.
How to Unlock Cells Later
This way, in case you will need to make changes later, you can simply press the Review > Unprotect Sheet and enter your password, which you could have used. The sheet is made edible once again.